Need to add a new user in Salesforce? We’ve got you covered with this simple guide. Follow these easy steps to set up your new team member quickly and efficiently. If you have any questions along the way, or if you need expert advice on roles and profiles, Digitalised Solutions is here to help! Let’s get started!
1. Navigate to Setup, found in the top right corner in the Setup Cog

2. Start searching for Users in the search bar and select the subheading Users under the Users heading

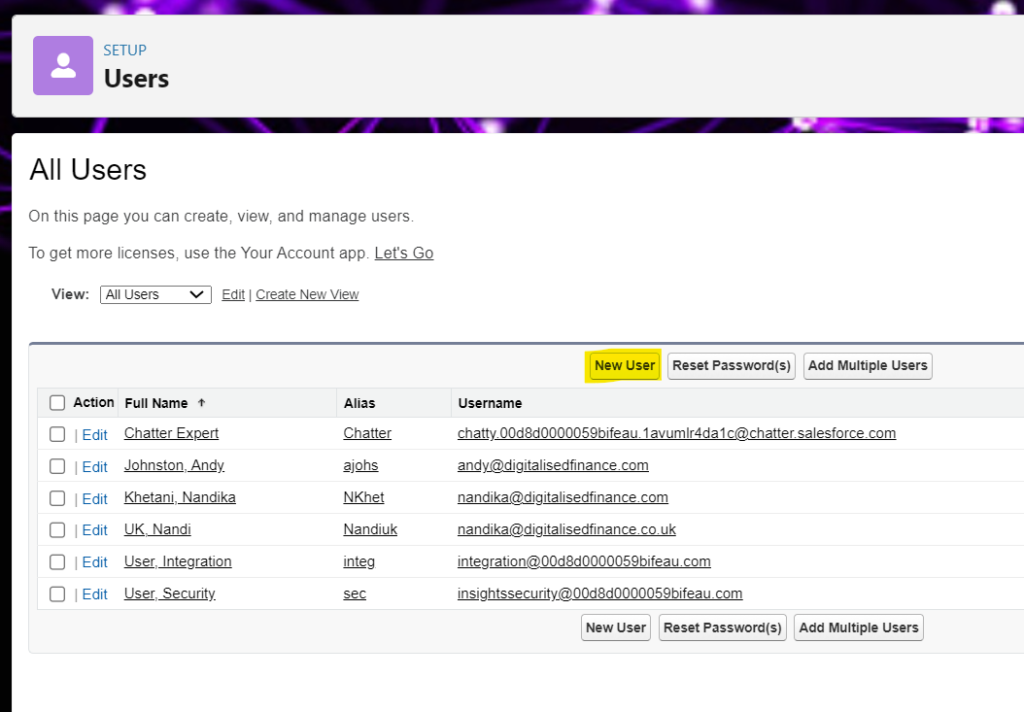
3. Select New User, found under the All Users section

4. Populate the highlighted fields below, some will auto populate, feel free to amend these. Select a Role (not required), a User Licence and a Profile.

5. Scroll to the bottom of the page and amend any Locale Settings as required.

6. Check the Generate new password and notify user immediately is selected to auto send a welcome email to the user which will enable them to set their own password.
Uncheck the Generate new password and notify user immediately if you wish to not give Salesforce access to the user just yet.

7. Select Save – and the new user has been created

In Salesforce, correctly setting up roles and profiles is essential for maintaining data security and operational efficiency. Roles determine the hierarchy and data visibility within your organization, while profiles control access to specific objects, fields, and functions. A well-structured role and profile setup ensures that users have the appropriate level of access needed for their responsibilities, without compromising sensitive data. If you need guidance on optimising your Salesforce roles and profiles, get in touch with us at Digitalised Solutions. We’re here to help streamline your Salesforce environment, with our Quick Start Packages.


